Showing posts with label Arms. Show all posts

Friday, February 21, 2014

NEW 23 Minute Whole Body Workout Video


Hi All!  Check out my new 23 Minute Whole Body Workout - Muscle Blow-Out Session at:

http://www.youtube.com/watch?v=83h4viTTnM8


Remember to give it a "thumbs up", share it, and subscribe!  Then stay tuned for more bootie kickin' goodness!

Friday, February 7, 2014

My Whole Body Workout on Fox4KC!


Happy February!  Amazing how time flies!  Many of you set fitness goals for your New Years Resolutions this year and now is when the initial excitement and enthusiasm typically starts to wane...kick up your routines with this short workout on Fox4KC. 

http://fox4kc.com/2014/02/03/meteorologist-joe-lauria-works-out-with-the-united-studios-of-self-defense/
(Please like the video and pass it on on your Twitter, Facebook, etc.)
Joe jumps in to our whole body workout


For the workout, do these moves back-to-back for 30 seconds each, alternating sides.  You will want to go for 4-8 rounds to get the full benefits.  As an alternative, you can simply add in the individual moves to your current workout to spice it up a bit.

Note:  This is an abbreviated version of the workout...Joe and I had a bit too much fun chatting to get the full piece in...so, stay tuned!  I will be posting the workout in it's entirety next week.

Wednesday, January 29, 2014

2-Minute Mini Workouts - How to stay fit throughout the day


With the New Year a lot of us made the resolution to exercise more this year…to be healthier and fitter.  Part of this commitment requires you to set aside time for yourself every week, time to invest in your health and thus in your future.  But, it’s also about making fitness and exercise a part of your everyday life.

Sometimes we have a hard time working out as much as we want to (or need to).  That’s what this week is all about how to exercise while on the move.

Continuing on my mission to help you all stay fit, active and toned this year, this week’s exercises will help keep you on track even when you can’t get in that extra 1 hour workout session.   Sound good?  Well get ready for the “Toothbrush Workout”! 

Ah…don’t dismiss this funny sounding muscle toner...these little sessions will help keep your legs toned, your booties lifted and your core and arms strong.  And, when schedules get pushed to the max, as will inevitably happen at some point, every mini-workout session counts (research has recently shown that these little mini-workouts throughout the day actually can add up to a full workout, giving similar health and physical benefits). 

Add in these 2 minute mini-workouts, morning and night, along with the other mini-workout ideas below to make sure you will be looking and feeling your very best, even when you can’t workout 4 or 5 days a week.

“Toothbrush Workout
 Note:  This is much easier if you have one of those electric toothbrushes…added benefit, those are better for your teeth anyway.

Leg Lifts – Back, Side, and Front
Begin by pulling in your belly, lifting you chest, and flexing your legs .  While holding on to the sink, we are going to do 10-15 repetitions on each kick, on each leg.  Try to keep the lifting leg from touching the ground so that you work the stabilizing muscles in your legs and core.
Back:  Lift your right leg straight behind you until you feel your hamstrings and glutes activate.  Pause for 1 second at the top of the lift before returning to the start position. 
Side: Keeping your right leg straight, lift your leg to the side while keeping your knee facing forward (this will work the sides of your leg); Think of pressing your hip forward.  If you let your knee point toward the ceiling you will be working the front of your leg.  Pause for 1 second at the top of the lift before returning to the start position. 
Front:  Make sure your belly is in, chest lifted, legs flexed.  Slightly turn your toes out in order to work your inner thighs along with the front of your leg.  Slowly and with control, lift your leg up in front of you.  Again, pause for 1 second at the top of the lift before returning to the start position. 

Squats
Start with your feet wider than shoulder width, belly pulled in, chest up and open.  Remember the lower you go the wider your feet will need to be.  That said, make sure you aren’t doing the splits!  Your knees should be over your ankles, not inside of your foot width or past your toes!  Keeping this position, press your knees out and squat down and back up, keeping the motion smooth.  Go for at least 40-50 squats.

Modification:  Hold on to a hand weight and add an uppercut punch as you press up from your squat.  Do 20-25 on one side, then switch hands and repeat (yes, this is where the electric toothbrush is really handy).

Stairs
Walk the stairs…easy enough!  You can alternate between taking stairs one at a time and two at a time.  Go as fast as you can go while still being safe with that toothbrush in your mouth.


More ideas:
Doing laundry?  Cooking?  Watching TV?  Try some of these 2 minute (or less) exercises ideas out.


  •        Need something upstairs or downstairs?  Take the stairs two to three times instead of just the once.
  •        Arm circles!  Jog in place while doing big arm circles to the side, overhead, and in front (Note: 

    you’re your arms pressing out and circle from the shoulder, not the elbow or wrist).
  •       Do the twist: Stand with your feet hip width apart, crunch your core, and twist side to side.
  •       Tricep dips using the sofa or chair (Note: Remember to keep your belly pulled in, chest up and open, and elbows pointing behind you.  Try to get your triceps parallel to the floor at a 90 degree angle).
  •      Counter push-ups…perfect to do in between stirring your dinner on the stove (Note: As always, keep your belly in and chest open.

Saturday, November 23, 2013

9 Minute Power Cardio Kickboxing VIDEO!!!

Check out my Cardio Kickboxing power workout on YouTube!  Remember to "Like", "Share", and "Subscribe"!  Then stay tuned because there is more to come!


Thursday, November 21, 2013

10 Minute Power-Workout -- Whole Body Interval Training

Whew-wee!  Only 1 week to go until Turkey Day!  Like me, I’m sure most of you out there are trying to figure out what to cook, how many people to plan for, and how to clean, decorate and get the house ready for guests.  All good things, but all time consuming.

That’s why this week I am going to feature another short, jam-packed exercise routine.  Even though extra time is pretty slim this next week, I know you can squeeze in a few 10 minute workouts.  Luckily, this routine utilizes the interval training method so you can blast away more calories and get the most out of your training (see last week’s information on interval training).
Aim for doing this workout routine at least 3 times over the next week.  Have more than 10 minutes?  Do the routine back-to-back or add in last week’s “15 Minute Power-Workout – Whole Body Interval Training”.

10 Minute Power-Workout – Whole Body Interval Training
Note: Grab a weight for this one to kick-it-up even more
1.       High Knees Jogging In Place (quickly)

2.       Jumping Jacks (touch your hands together at the top and go wide with your legs)

3.       Jabs with Weight (30 seconds each side – fast!  Make sure to pull your arm all the way back)

4.       Squat Front Ball Kicks (squat low and kick high (get your knee up!) while holding your weight to your chest)

5.       Invisible Jump Rope

6.       Bicycle Crunches (hold your weight to your chest)

7.       Mountain Climbers (try to balance your hands on your weights)

8.       Hands and Knees Back Kick (30 seconds each side – fast!  Keep your belly pulled in, knee to chest, then press straight back through your heel)

9.       Quick Side-to-Side Step (touch your feet together and twist your arms across your body)

10.   Squats with Tricep Curl (hold your weight between your hands, behind your head – extend your hands up as your squat down low)

11.   Side Blade Kicks (30 seconds each side – fast! Keep your toes pointing to the front as you kick out, pull your leg back in to work your inner thighs)

12.   Jumping Jacks (touch your hands together at the top and go wide with your legs)

13.   Invisible Jump Rope Backwards

All bolded items are hard and fast for 1 minute (unless specified 30 seconds each side).  Push yourself and get winded; this is essential to get the full benefit of interval training.
All non-bolded items are 30 seconds and the “easy” section of the workout.  Try to relax your breathing but still keep working!  Move at a moderate pace; you should be able to talk to a friend but still be breathing a bit heavier than normal.

 Like this?  Follow me on Pinterest and pass it on to a friend!  Plus, continue to check out my www.bewellwithjanell.com blog for more great exercise moves and tips for living your best life.  Want to try out a class with Janell?  Call Kempo Fitness (913-649-4422) and reserve a free introductory lesson.

Thursday, September 12, 2013

Tone Your Triceps with the Tricep-Punch Combo

I’m down to a week for my next black belt test; wow.  There really is no way to cram years of training into a week of prep so all I can do now is walk through (mentally and physically) my material as much as possible and then trust in myself.  So, I have a whole week to combat any jitters that pop up with a mental pep talk of: “come on, I can do this!  I’ve got this!  I will get through it and I will do great!” etc. But to be honest, once you have the training and the practice, it’s your confidence and faith in yourself that is one of the biggest determining factors for how you will perform.

Today is a lovely dare-I-say (almost) Fall weather day.  I’m sitting here enjoying a bowl of freshly cut peaches, kiwi, and purple grapes (so sweet and satisfying who could need candy!) with a spaghetti squash in the oven to eat with my fresh picked tomato, zucchini, and pepper meat sauce.  Yum, yum, yum!  It’s an ultra healthy food day that makes me really appreciate the warm weather and the delicious foods we can grow.    I have a small garden in the back and although it’s my first year with it, and I definitely could have done a better job, there is still something so special and rewarding about going out to pick my own fruits and vegetables (especially with my son).
If you haven’t jumped into gardening, there is still time to jump in and try it out.  Broccoli and kale are two super green foods that love the cooler Fall weather.  Although we are past the prime time to plant, head to your local nursery to find matured vegetables you can still plant and harvest.  Plus, they can fill you in on what you need to do to help them thrive.  Later this Fall I will write up some of my favorite broccoli and kale recipes so we can all savor the bounty of our efforts together!  Live here in Kansas City?  I love going in to Soil Service Nursery Center on 71st and Troost; I always find them to be knowledgeable, helpful, and with quality plants.
This week we are going to focus on the arms with the:


Tricep-Punch Combo
Note:  You will want to use a hand weight to kick up the volume on this exercise.   Don’t have a hand weight?  Grab a can of soup, a bottle of water, or any other weighted item you can hold onto. 
Start in a mini lunge position with your left foot in front.  Pull your belly in, open and lift your chest, and relax your shoulders.  In addition, activate your thigh muscles and feel as though everything is pulling into your middle.  Hold the weight in your right hand and bring your hand up to your armpit (consider this your starting position).  From here, extend your hand out behind you, lifting up until your feel your tricep muscle activate; reset to your starting position.  Now punch out in front of you, pressing out with your tricep and pulling back in with your bicep.  This is one repetition.  Do 10-20 reps on each side for 2-3 rounds.
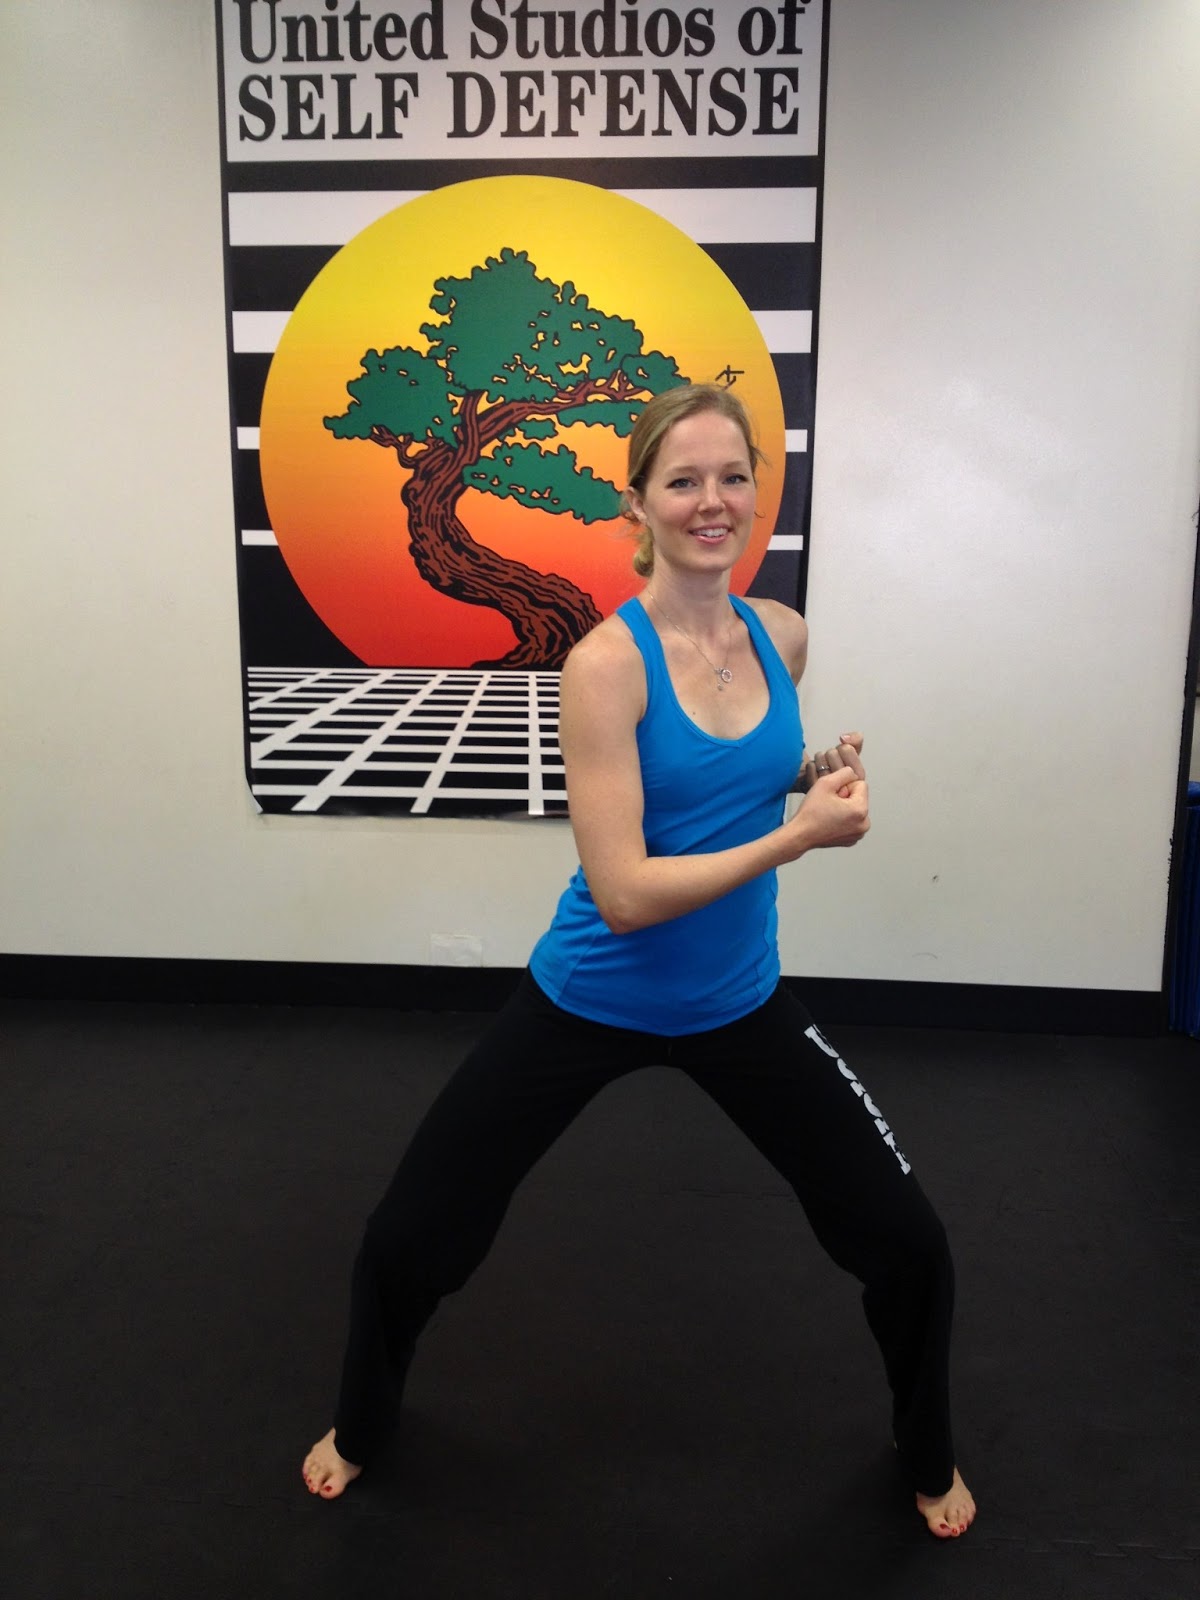
Have a great week and good luck with the veggies!

Tuesday, July 9, 2013

Week 5 - postpartum - journey back to great shape

Week 5.  Ah…we are almost there!  We are almost to that big milestone of being 6 weeks postpartum.  I really thought I would be back to work teaching martial arts (and cardio kickboxing) this week, after all, I went back after 4 weeks when I had my son…but I just couldn’t bring myself to leave my kiddos yet.  It really is a whole different ball game with 2 kids!  It’s interesting because on one hand, we’re less stressed because we’ve already been through this before, which has left us with an assurance that we know what to do and that we can handle it.  On the other hand, there is definitely no more napping while my little one sleeps because her older brother still is running around and needing my attention.  I’m definitely still learning how to juggle the needs of my 1 month old daughter while still playing, feeding, and snuggling with my (almost) 2 year old son.  So, even though I felt a little guilty deciding not to go back in to our work this week, I just couldn’t do it yet.  And to be honest, all the women I told I would be back after a month had this immediate response: “oh!  That’s not enough time!”…so maybe the one who needs to be easier on me is…me.  (Although I do still like to think of myself as a Super Woman).

This week, we had a lot of events for our business, Kempo Fitness (with United Studios of Self Defense).  Typically I would be working all of these events but since I am still considering myself to be on maternity leave, my wonderful husband got to hold down the fort.  That said, I really couldn’t stay away fully!!  ;)  One of the events was a local art show that we had a booth at.  Since this booth was close to our house I decided to walk down there with both kiddos.  Now, we had decided we didn’t need a double stroller, so I was left with our totally awesome Jeep stroller.  This stroller was built for off-roading, being tough and  easily maneuverable with air tires and even shocks, but it was not built for 2…until I came around.  Oh yes, I walked to our booth 4 times with my daughter safely strapped into her infant seat while my son got to ride perched on the handle bars.  Since I used 1 arm as a seat beat for my son, that left only 1 hand to actually push the stroller…now let me tell you…that is a good arm and core workout!
But since this is not the “workout” route I would recommend to all of you out there, let’s focus on another move. 

Arm Circles

This is a really easy shoulder exercise, one you can do anywhere.  You can do it standing, walking, or even jogging in place.  To get started, lift your arms out to the sides at shoulder level; extend your arms out as far as they can go to activate all of your arm, chest, and upper back muscles.  Pull your belly in to support your lower back as you open your chest and drop your shoulders.  Maintain this position throughout the exercise.

From here, simply draw circles in the air with your arms (rotate from your shoulders, not your elbows or your wrists!).  I like to go out to the sides, then up over head, and finally down in front of body for about 1 minute intervals.  Mix it up by circling forward or backward in varying circle sizes.

This is a gentle way to start toning your upper body while gently staring to exercise your core muscles.

Wednesday, June 12, 2013

Tone Your Arms with the "Rising Forearms" Move

Oh my goodness, it has gotten hot, hot, hot outside!  Hello Summer!  This week we are focusing on our lovely arm muscles again.  And with the hot weather, who wouldn’t want to show off some toned arms with a sleeveless shirt?

This week’s exercise can easily become a whole body exercise so make sure to try out the variations below.


Rising Forearms (an “Overhead Block” in Kempo)
 
Begin with your legs wide (as though you were going to do a squat); keep your knees pressing out to activate your inner thighs and protect your knees.  Pull your belly in to support your lower back, open and lift your chest, and relax your shoulders.  Maintain this position throughout the exercise. 
Pull your hands into your armpits, bringing your elbows behind you; we call this “Elbow Position” in Kempo.  Try to keep your hands coming back to this position as it will work your back and triceps.  Now for the move: keeping your arm bent, bring your right arm in front of you and across your body, then forcefully shoot your arm up above your forehead.  Repeat on the other side.  That’s it!  Go for 2-3 1 minute rounds.  These speed rounds will create long, lean muscles…great for tank tops!

Note: The faster you move and the more power you put into it, the better of a workout you will get.  So make sure you really push yourself and push those arms!

Variation 1: If you want more of a challenge or to build a bit more muscle, add hand weights.  I recommend light weights (between 1-5 pounds) so that you can keep the 1 minute rounds.  Note:  as soon as your shoulders start lifting up toward your ears and you can’t keep them down (your trapezius muscle will be starting to hurt), you need to drop the weights and keep going without them.  Your shoulders are lifting because your arm muscles are getting fatigued.  This means your body has to recruit more muscle groups in order to keep doing the same movement and in this case, you are probably straining something.  If you keep going, yes you will still get a workout, but you will most likely also end up with a sore neck.
Variation 2: Add squats to get your legs more involved.  As your hand starts low, start low in your squat; as your hand shoots up, explode up out of your low stance.  Slow your rhythm down slightly so that you can get a nice deep bend in your squat.  Note: remember to keep your knees over your feet (you should be able to see your toes)!
Variation 3: Exhale loudly from your mouth as your right arm shoots up (inhale with your left).  This will contract your abdominal muscles, giving you a standing core workout.  You will have to forcefully expel your air in order to contract your muscles.  Note: vary the inhale-exhale with your movement (you don’t want to hyperventilate or turn blue!)  For example, if you are doing variation 2, you might inhale on your squat and exhale on the rising up.

 Let me know which variation you like the most.  Have a great week!

Thursday, May 23, 2013

Nordic Jumping Jacks -- Great for the Whole Body!

This week we are doing a variation on an old classic: jumping jacks!  I love adding jumping jacks into my workout routine because they are a great way to warm up and exercise the entire body.  If you keep your arms straight, extending out, and lift your arms all the way up over head you will get an excellent arm (specifically shoulder) workout.  And, if you take long strides with your legs, you will work all the way up and down your legs.  So jump on board and start those jumping jacks!


 Nordic Jumping Jacks

 Begin standing with your hands at your sides.  As always, pull your belly in to support your lower back, lift and open your chest, and relax your shoulders.  Inhale, bringing your arms up overhead (try to touch your hands together while keeping your arms straight); at the same time, jump your left foot in front and your right foot in back.  Exhale, bringing your arms back down, jumping your left foot back and your right foot forward.  That’s it! 
 
There are multiple ways to add these jumping jacks into your routine.  I like using them in the beginning and in between exercises (as a “cool down”).  Here are a few options.

  •  3 rounds of 50 jumping jacks
  • 1-2 rounds of 100 jumping jacks
  • 4 rounds of 30 seconds
  • 2-3 rounds of 1 minute
  • 4 rounds of 20 jumping jacks, followed by 10 as fast as you possibly can go

Have fun!

Wednesday, May 1, 2013

Great Arms and Legs - Plus, Baby Girl is Comin'!

We are in the final week before our baby girl is born; in fact, once this blog goes up she might already be with us.  This is a fact that I am both super excited for, and yet, a little stressed about.  I’m excited because I know that from the moment she is placed on my belly I will love her completely, thinking (knowing) that she is the most wonderful being ever.  And I can’t wait to see my husband holding our little baby girl, with love in his eyes, knowing he is totally going to be wrapped around her little tiny finger.  With big sister, I see them playing for years to come, as big sis teaches her how to do her hair and look cute while still being tough, strong, a great athlete and a seriously smart cookie.  As for our son, the awesome, super, little ninja that he is, I just hope and pray every day that they are close and that he always knows that we love and support him. 

But on the stress side, there’s just so much to do and to get done!  And how will having a baby girl affect our lives?  At work this week one of our instructors said to me “you seem stressed”.  My response was   “well, yeah, I am.  There is so much I want to happen and I only have a week left to get it all done”.  But here’s the thing with stress: it can be both good and detrimental.  It’s not good to be a wound-up ball of stress; however, if you care about something, and want to get something done, you’ve got to want it so much that you do get a little stressed about it, because that is what is going to push you to do more, strive to achieve, and get results. 
So for now, I’m going to keep plowing forward and taking what’s good, to great; because soon, very soon, it will be time to relax and focus on our family while celebrating our new, wonderful, and beautiful baby girl.

This week is Arm Week!  (With the added bonus of working your core and legs as well!)
 
Squat with Shoulder Press
This is one of my favorite exercises to end a class with (and yes, I still do this one, even now, very prego).

Begin with feet wide for a squat position with weights in your relaxed arms.  Pull your belly in to support your lower back, open your chest up, and relax your shoulders.  As always, maintain this position throughout the exercise.  Now it’s time to work our muscles!  Remember, as you squat down to keep your toes over your ankles to support your knees (do not let your knees come forward past your toes or buckle in).  As you squat down, curl your weights up under your chin; at the bottom of your squat, press the weights up over head.  Return to your starting position.  That’s it!  Do 3-5 rounds of 10-20 reps.


For more information on Janell and her classes, visit: www.kempofitnesskc.com

Plus, stay tuned to www.bewellwithjanell.com to see how she is getting back into shape after having her baby girl!

Wednesday, April 10, 2013

Work Your Arms and Legs with - Rising Elbow Power!

My husband and I were driving in the car recently and we had one of our classic life-changing, life-planning conversations; something we do at least twice a year.  In these we end up talking about how all aspects of our lives are going, discuss things we’d like to make adjustments in, and then plan out the future, both immediate and more long term; this last conversation resulted in a three to five year game plan.

As I said last week, Spring is a time of growth and renewal; let it be the same thing for your life.  What do you want this next year to be?   What changes do you want/need to make?  Sit outside, soak up the feeling of Spring and feel out what you really want; then make a game plan and begin making the adjustments.  Maybe it’s as simple as re-evaluating what you came up with for the New Year…maybe it’s something entirely new (big or small); either way, tap into it and let the new beginnings and opportunities that come with Spring inspire you and carry you to your new goal.
This week we are working our legs and arms with Rising Elbows.  In the martial arts, elbows are used for “in-tight fighting” (defending).  They are very strong and powerful as long as you use your entire body to strike; think of this exercise as a chance to hone in our your entire-body power!

Rising Elbow Power
Begin with your feet wide in a comfortable squat position (that means knees are bent and muscles are working but you don’t have to be all the way down).  In martial arts this is our “horse stance”.  Remember, the lower you are able to squat down, the farther apart your feet need to be.  Rule of thumb: you always need to have your knees over your feet and be able to see your toes when you glace down (knees pressing out and bootie back); this will protect your knees so that you can do many more squats and movements for years to come.  In addition, go as low as you can go while keeping your back upright.
Pull your hangs up to your armpits with your elbows back (“elbow position”), keeping your chest open and your head up.  Now it’s time for the rising elbows.  Drop into a low squat position as your drop your right elbow down in front of your belly.  From here, explode out of your squat, simultaneously rising up in your stance and forcefully pushing your elbow up until it is in front of your nose.  As you do this, exhale (audibly) from your belly; this will activate your core muscles, giving you a better workout and more power.  Repeat on your left side. 
Go fast and strong for 1 minute; repeat for 2-3 more rounds.

Wednesday, April 3, 2013

Core Strength with Centered Push-Ups

Happy April!  I hope you all had a wonderful holiday week with friends and family, enjoying the beautiful weather!  My family and I actually spent the weekend home and healthy, something that hasn’t happened in over a month; it was wonderful!  I think each day we went for at least 3 walks outside, listening to all the birds chirping, looking at the buds and leaves coming out on all the trees, and enjoying the time together.  As I’m sure all of you can tell by now, I love Spring.  It is such a beautiful and wonderful time of growth and renewal…it always fills me with a sense of joy, new beginnings, and opportunity.

This week we are going to focus on our core muscles with a simple, modified Push-Up (“Plank”) position. The exercise is really quite simple in it’s movement, and yet it will work your entire body.  This is a toning exercise, not a cardio exercise, so make sure you add in some fast paced movements from prior weeks as well.

Centered Push-Up
NOTE:  You will want to use a weighted ball or balance ball for this exercise

Begin on the ground with your hands resting on the ball.  Bring your shoulders over your hands keeping your elbows bent slightly, chest open, and head up.  Pull your belly in toward your spine to support your lower back and step back into a push-up position (you can also do this on your knees).  Tuck your glutes under, strengthen your thighs, and extend through your heels; this will keep all of the muscles in your body activated.  Being on the ball instead of on the ground will really challenge your core, stabilizing muscles; make sure you keep centering into your belly and pulling your core in.  NOTE: If you are on your toes and your lower back begins to hurt (or if it starts to dip down toward the ground), you need to drop down to your knees!  Hold for 1 minute and then do a cardiovascular exercise; repeat for 2-3 more rounds.

Want an extra arm challenge?  Maintain the same position as above but alternate between adding in push-ups on the ball and simply bending your arms and holding.

Wednesday, March 20, 2013

1, 2, 3, POWER! - Get Ready For Toned and Fabulous Arms!

Congratulations!  It’s now officially Spring!  Even though it sure doesn’t feel like it this week, Spring weather is coming soon; that means we’ll all be flashing our guns in no time…our super toned and fabulous arms that is.  However, if your arms aren’t quite as impressive as you’d like them to be, or you just want to make sure they stay looking great, then read on and enjoy this week’s arm blaster.

This week we are going to rock the arms with a triple jab/cross combo.  This exercise is fast-paced and endurance driven so get ready to work those arms and feel the burn!

1, 2, 3, POWER!
NOTE: Although I love the practical self defense application of practicing from an “on guard” position with your hands up to protect your face (this is what I am demonstrating in the photo with a “front two knuckle punch”), I have found that my cardio kickboxing students have better form and are able to work the full range of the movement easier if they just keep returning their hands to their armpits.  I also recommend doing a “thrust punch” which will keep the pinkie side of your hand down towards the ground the entire time; this will keep your elbows down throughout the punch (very important).  Again, to do the punch correctly, and get the most out of it, start from the armpits, keep your elbow down and in tight to your body the entire time, and extend your punch all the way (just shy of locking your elbow).  Once you have this, the rest is easy!

Start with your feet staggered (think of standing on the corners of a box) with your hands pulled up by your armpits.  If your right foot is in front, you are going to punch 3 times with your right hand (a “jab”) followed by 1 punch with your left hand (a “cross”).  This rear hand should have more power since you are able to use the torque and strength of your legs and hips in the strike.  As you are punching, think: fast, fast, fast, POWER…fast, fast, fast, POWER (no breaks allowed; keep the tempo up).  To help you keep your speed up, I recommend listening to some upbeat music with a fast, strong bass (in class we listen to Pandora’s “Dance Cardio Radio”).   

Go for 1 minute with your right as the 1, 2, 3 (and your right foot in front) and then 1 minute with your left as the 1, 2, 3 (with your left foot in front).  Remember to extend your punch all the way and then keep that arm coming back all the way to your armpit…this will get harder to do the farther into the 1 minute round you get.  But remember, if you want to sleeveless shirts with pride, keep going!

Enjoy!