Showing posts with label Core. Show all posts

Friday, February 21, 2014

NEW 23 Minute Whole Body Workout Video


Hi All!  Check out my new 23 Minute Whole Body Workout - Muscle Blow-Out Session at:

http://www.youtube.com/watch?v=83h4viTTnM8


Remember to give it a "thumbs up", share it, and subscribe!  Then stay tuned for more bootie kickin' goodness!

Friday, February 7, 2014

My Whole Body Workout on Fox4KC!


Happy February!  Amazing how time flies!  Many of you set fitness goals for your New Years Resolutions this year and now is when the initial excitement and enthusiasm typically starts to wane...kick up your routines with this short workout on Fox4KC. 

http://fox4kc.com/2014/02/03/meteorologist-joe-lauria-works-out-with-the-united-studios-of-self-defense/
(Please like the video and pass it on on your Twitter, Facebook, etc.)
Joe jumps in to our whole body workout


For the workout, do these moves back-to-back for 30 seconds each, alternating sides.  You will want to go for 4-8 rounds to get the full benefits.  As an alternative, you can simply add in the individual moves to your current workout to spice it up a bit.

Note:  This is an abbreviated version of the workout...Joe and I had a bit too much fun chatting to get the full piece in...so, stay tuned!  I will be posting the workout in it's entirety next week.

Wednesday, January 29, 2014

2-Minute Mini Workouts - How to stay fit throughout the day


With the New Year a lot of us made the resolution to exercise more this year…to be healthier and fitter.  Part of this commitment requires you to set aside time for yourself every week, time to invest in your health and thus in your future.  But, it’s also about making fitness and exercise a part of your everyday life.

Sometimes we have a hard time working out as much as we want to (or need to).  That’s what this week is all about how to exercise while on the move.

Continuing on my mission to help you all stay fit, active and toned this year, this week’s exercises will help keep you on track even when you can’t get in that extra 1 hour workout session.   Sound good?  Well get ready for the “Toothbrush Workout”! 

Ah…don’t dismiss this funny sounding muscle toner...these little sessions will help keep your legs toned, your booties lifted and your core and arms strong.  And, when schedules get pushed to the max, as will inevitably happen at some point, every mini-workout session counts (research has recently shown that these little mini-workouts throughout the day actually can add up to a full workout, giving similar health and physical benefits). 

Add in these 2 minute mini-workouts, morning and night, along with the other mini-workout ideas below to make sure you will be looking and feeling your very best, even when you can’t workout 4 or 5 days a week.

“Toothbrush Workout
 Note:  This is much easier if you have one of those electric toothbrushes…added benefit, those are better for your teeth anyway.

Leg Lifts – Back, Side, and Front
Begin by pulling in your belly, lifting you chest, and flexing your legs .  While holding on to the sink, we are going to do 10-15 repetitions on each kick, on each leg.  Try to keep the lifting leg from touching the ground so that you work the stabilizing muscles in your legs and core.
Back:  Lift your right leg straight behind you until you feel your hamstrings and glutes activate.  Pause for 1 second at the top of the lift before returning to the start position. 
Side: Keeping your right leg straight, lift your leg to the side while keeping your knee facing forward (this will work the sides of your leg); Think of pressing your hip forward.  If you let your knee point toward the ceiling you will be working the front of your leg.  Pause for 1 second at the top of the lift before returning to the start position. 
Front:  Make sure your belly is in, chest lifted, legs flexed.  Slightly turn your toes out in order to work your inner thighs along with the front of your leg.  Slowly and with control, lift your leg up in front of you.  Again, pause for 1 second at the top of the lift before returning to the start position. 

Squats
Start with your feet wider than shoulder width, belly pulled in, chest up and open.  Remember the lower you go the wider your feet will need to be.  That said, make sure you aren’t doing the splits!  Your knees should be over your ankles, not inside of your foot width or past your toes!  Keeping this position, press your knees out and squat down and back up, keeping the motion smooth.  Go for at least 40-50 squats.

Modification:  Hold on to a hand weight and add an uppercut punch as you press up from your squat.  Do 20-25 on one side, then switch hands and repeat (yes, this is where the electric toothbrush is really handy).

Stairs
Walk the stairs…easy enough!  You can alternate between taking stairs one at a time and two at a time.  Go as fast as you can go while still being safe with that toothbrush in your mouth.


More ideas:
Doing laundry?  Cooking?  Watching TV?  Try some of these 2 minute (or less) exercises ideas out.


  •        Need something upstairs or downstairs?  Take the stairs two to three times instead of just the once.
  •        Arm circles!  Jog in place while doing big arm circles to the side, overhead, and in front (Note: 

    you’re your arms pressing out and circle from the shoulder, not the elbow or wrist).
  •       Do the twist: Stand with your feet hip width apart, crunch your core, and twist side to side.
  •       Tricep dips using the sofa or chair (Note: Remember to keep your belly pulled in, chest up and open, and elbows pointing behind you.  Try to get your triceps parallel to the floor at a 90 degree angle).
  •      Counter push-ups…perfect to do in between stirring your dinner on the stove (Note: As always, keep your belly in and chest open.

Saturday, November 23, 2013

9 Minute Power Cardio Kickboxing VIDEO!!!

Check out my Cardio Kickboxing power workout on YouTube!  Remember to "Like", "Share", and "Subscribe"!  Then stay tuned because there is more to come!


Thursday, November 21, 2013

10 Minute Power-Workout -- Whole Body Interval Training

Whew-wee!  Only 1 week to go until Turkey Day!  Like me, I’m sure most of you out there are trying to figure out what to cook, how many people to plan for, and how to clean, decorate and get the house ready for guests.  All good things, but all time consuming.

That’s why this week I am going to feature another short, jam-packed exercise routine.  Even though extra time is pretty slim this next week, I know you can squeeze in a few 10 minute workouts.  Luckily, this routine utilizes the interval training method so you can blast away more calories and get the most out of your training (see last week’s information on interval training).
Aim for doing this workout routine at least 3 times over the next week.  Have more than 10 minutes?  Do the routine back-to-back or add in last week’s “15 Minute Power-Workout – Whole Body Interval Training”.

10 Minute Power-Workout – Whole Body Interval Training
Note: Grab a weight for this one to kick-it-up even more
1.       High Knees Jogging In Place (quickly)

2.       Jumping Jacks (touch your hands together at the top and go wide with your legs)

3.       Jabs with Weight (30 seconds each side – fast!  Make sure to pull your arm all the way back)

4.       Squat Front Ball Kicks (squat low and kick high (get your knee up!) while holding your weight to your chest)

5.       Invisible Jump Rope

6.       Bicycle Crunches (hold your weight to your chest)

7.       Mountain Climbers (try to balance your hands on your weights)

8.       Hands and Knees Back Kick (30 seconds each side – fast!  Keep your belly pulled in, knee to chest, then press straight back through your heel)

9.       Quick Side-to-Side Step (touch your feet together and twist your arms across your body)

10.   Squats with Tricep Curl (hold your weight between your hands, behind your head – extend your hands up as your squat down low)

11.   Side Blade Kicks (30 seconds each side – fast! Keep your toes pointing to the front as you kick out, pull your leg back in to work your inner thighs)

12.   Jumping Jacks (touch your hands together at the top and go wide with your legs)

13.   Invisible Jump Rope Backwards

All bolded items are hard and fast for 1 minute (unless specified 30 seconds each side).  Push yourself and get winded; this is essential to get the full benefit of interval training.
All non-bolded items are 30 seconds and the “easy” section of the workout.  Try to relax your breathing but still keep working!  Move at a moderate pace; you should be able to talk to a friend but still be breathing a bit heavier than normal.

 Like this?  Follow me on Pinterest and pass it on to a friend!  Plus, continue to check out my www.bewellwithjanell.com blog for more great exercise moves and tips for living your best life.  Want to try out a class with Janell?  Call Kempo Fitness (913-649-4422) and reserve a free introductory lesson.

Thursday, November 14, 2013

15 Minute Power-Workout: Whole Body Interval Training

We are down to only 2 weeks before Thanksgiving festivities ensue…followed by 2 months of jam-packed schedules of get-togethers, events, and celebrations.  Although your time might be limited, continuing to workout is going to be essential to maintaining your health and fitness goals….and your sanity!

Over the last year I have continually read and heard about the benefits of interval training, giving you more results in less time (or even greater results in the same amount of workout time).  A doctor I heard of the radio the other day even said he saw comparable benefits in individuals who did 3 30-minute interval training workouts a week as those who did 5 1-hour regular workouts a week (Check out the first link below).  Luckily for my students (and all of you) this is how I have structured all of my cardio kickboxing classes!
While all of our time will be limited over the next few months, let’s use interval training to our advantage!  So let’s get started with this 15 minute power-workout routine to rev up our engines and make sure we look and feel great this holiday season!  Then, stay tuned in to Be Well With Janell because I will continue to upload new workouts, exercises, pictures, videos (yay!), and more!

Note: Want to make it a high-intensity interval training workout (HIIT)?  Use a heavy bag and weights for all the exercises below – not sure how to do these moves?  Check out my blog or call in to our dojo and we’ll get you taken care of (Kempo Fitness – 913-649-4422).

15 Minute Power-Workout: Whole Body Interval Training

1.       Jumping Jacks (30 seconds regular, 30 seconds Nordic)

2.       Jabs (1 minute each side, with fast feet)

3.       Jog with High Knees

4.       Side Blade Kick Leg Lifts (1 minute each side)

5.       Jump Rope

6.       Squat Front Ball Kicks

7.       Side Shuffle Step – fast!

8.       Backward Jump Rope

9.       Mountain Climbers

10.   Side-to-Side Step with Arm Lifts

11.   Punches – hard and fast, with squat (10 punches high, 10 in your lowest squat, repeat)

12.   Side Knees (1 minute each side)

13.   Jumping Jacks

14.   Side Shuffle Step – fast!

15.   Cool Down Jog

All bolded items are hard and fast for 1 minute (unless specified 1 minute each side).  Push yourself and get a bit winded; this is essential to get the full benefit of interval training.
All non-bolded items are 30 seconds and the “easy” section of the workout.  Try to relax your breathing but still keep working!  Move at a moderate pace; you should be able to talk to a friend but still be breathing heavier then normal.

 Check out these websites for more information on the benefits of interval trainings:
http://www.mayoclinic.com/health/interval-training/SM00110


Wednesday, October 30, 2013

Raised Bridge - Lift Your Bootie and Tone Your Core

Happy Halloween! 

Halloween is here, marking the start of the holiday (and dare I say eating) frenzy that takes place over the next 2 months.  But, if the tempting food and jammed schedules aren’t enough, we often add the pressure of looking extra good for all the holiday pictures that will be taken.  But, never fear, I will be here to help you through it all with tips, tricks, exercises, and more to make this holiday a great one!
This week we’re going to work our core muscles, inner thighs and bootie all with one exercise… the:
Raised Bridge
(Note:  To increase the intensity of this move, add a weight) 
Begin on your back with your feet on the ground and your feet hip width apart.  If you are going to do this move without a weight, place your hands down by your sides, palms down.  Pressing your feet down into the ground, exhale while you press your bootie up toward the ceiling, holding your core muscles strong.  In this position, think of pulling your thighs into each other, keeping your knees hip width apart; this will activate your inner thigh muscles.  Press down into your floor with our feet to activate your hamstrings.  Lastly, lift your bootie up to the ceiling that little bit extra to really get your glutes working.  Inhale and release back down to your starting position. 
If you are doing this move right, you should feel your core, glutes, hamstrings, and thighs.  Go for 2-4 rounds of 15 reps.

Friday, July 19, 2013

Work your Core (and Whole Body) with the Ballerina Bow!

This week I am writing with an injured pinkie finger.  The reason I mention this is not that I’m hurt, but because of how I got hurt.  As you know, I recently had a beautiful little girl (2 months ago) and I just started teaching again and doing my cardio kickboxing classes, all of which are going great.  I started back to my martial arts training this week, which also went great, until we started goofing around.  You see, I didn’t get hurt punching or kicking the heavy bag, nor did I get hurt practicing defensive maneuvers and takedowns with my fellow instructors, no, instead I jammed all the joints in my pinkie finger while goofing around. 

I mention this because we often hear “oh, I’m too old for that” when asked if they want to try martial arts or cardio kickboxing.  I think the fear of getting hurt is perpetuated by all the MMA out there and (to be honest) poor instructing.  Our students are more likely to get hurt out riding their bike, walking in their yard, shoveling the show, etc. then in our dojo.  When working out, it is important to find a place that is safe and fun, a place that will teach proper technique, make sure you are actually doing it, and then teach you how to modify as needed.  If you go to a place like this, like ours, you can do marital arts or cardio kickboxing at any age.
-

It’s core work this week!  So get ready for the:
Ballerina Bow

Note: If you tend to have lower back pain, try substituting this move out for the standard floor crunches.
Begin standing.  Pull your belly in to support your lower back, open and lift your chest, and relax your shoulders.  Maintaining this position, raise your arms up over head, making sure to keep them straight and extending out through your fingertips (this activates all of your arm muscles).  This is your starting position.  To do the Ballerina Bow, simply bring your right leg up as you simultaneously bring your arms down in front of you; think of high-fiving your shin.  Then return to your starting position and repeat on the other side.  That’s it!  You are doing the Ballerina Bow.  Remember to fully extend your lifting leg to activate your leg muscles; the higher you lift your leg, the more you will work your lower abdominal muscles. 
The best part about this exercise is that it will work your entire body.  After just a few of these you should start to feel your shoulders, core, and quads beginning to burn; this is a good thing!  Go for 3 1-minute rounds, making sure to keep the tempo up in order to get your heart rate up. 

Wednesday, June 26, 2013

Core Workout with the Leg Roll!

This week my family is headed to the Bartlett family get-together where the cousins get to run around and play together, the grandparents are in heaven because they are will the whole clan, and us parents (hopefully) get to relax a little (ahhhh).  During this trip I know there will be lots of physical activities: swimming, hiking, and games of tag (to name a few).  Although these are not the traditional workout, they will definitely be doing just that: working us out!  With all of warm summer days ahead, I encourage all of you to try out a few of these fun activities; just make sure you actually do them hard and fast enough to get your heart rate up a bit!  Getting out in nature to exercise will not only be good for your body, mind, and spirit, it will also be a lot of fun.

That said, if you’re camped out inside or watching movies with the family, try out this core toning exercise; you can lie down, “relax”, and still be working on those great abs!

Leg Roll
NOTE:  You ideally want to use an exercise ball; if you don’t have one, you can modify by putting your legs up on a sofa (but it will be a bit more challenging).

Start by lying on your back, arms extended out from your sides.  Pull your belly in while pressing your arms and palms into the floor to support your lower back; this will also activate more muscle groups, giving you a better whole body workout.  Maintaining this position, bring your feet up to the sides of the ball.  Think of squashing the ball by pulling your legs together to activate your inner thighs.  Take a deep breath in as you twist your legs and hips to the right (rolling the ball with your legs); exhale and return back to your starting position.  Inhale and twist to the left, rolling your right hip up; exhale and return back to your starting position.  The farther you roll the more core and stabilizing muscles you will use.  Remember to use your arms for balance and support.  Go for 3 sets of 10 – 20 repetitions (right side, left side = 1 repetition).
Have a great week!  Remember to keep moving your body (and having fun) whether you’re inside, or outside.

Wednesday, June 19, 2013

Lunge/Knee Combo - Tone Those Legs!

This week we are all about the legs.  I am almost to the 6 week mark after having my daughter and I am itching to do exercises like this (but I have to wait for the a-okay from my doctor) so I will have to live vicariously through all of you.

This move is great for your legs, glutes, and core.  That said, if done incorrectly it can lead to knee or back pain so PLEASE, read the instructions below.  It’s like I tell my students: if you start to hurt where you shouldn’t (back or joint), stop, take a break, make sure you are doing it correctly, and then try again at an easier level; however, if it’s your muscles that are hurting, suck it up and keep on going! ;)

Lunge/Knee Combo

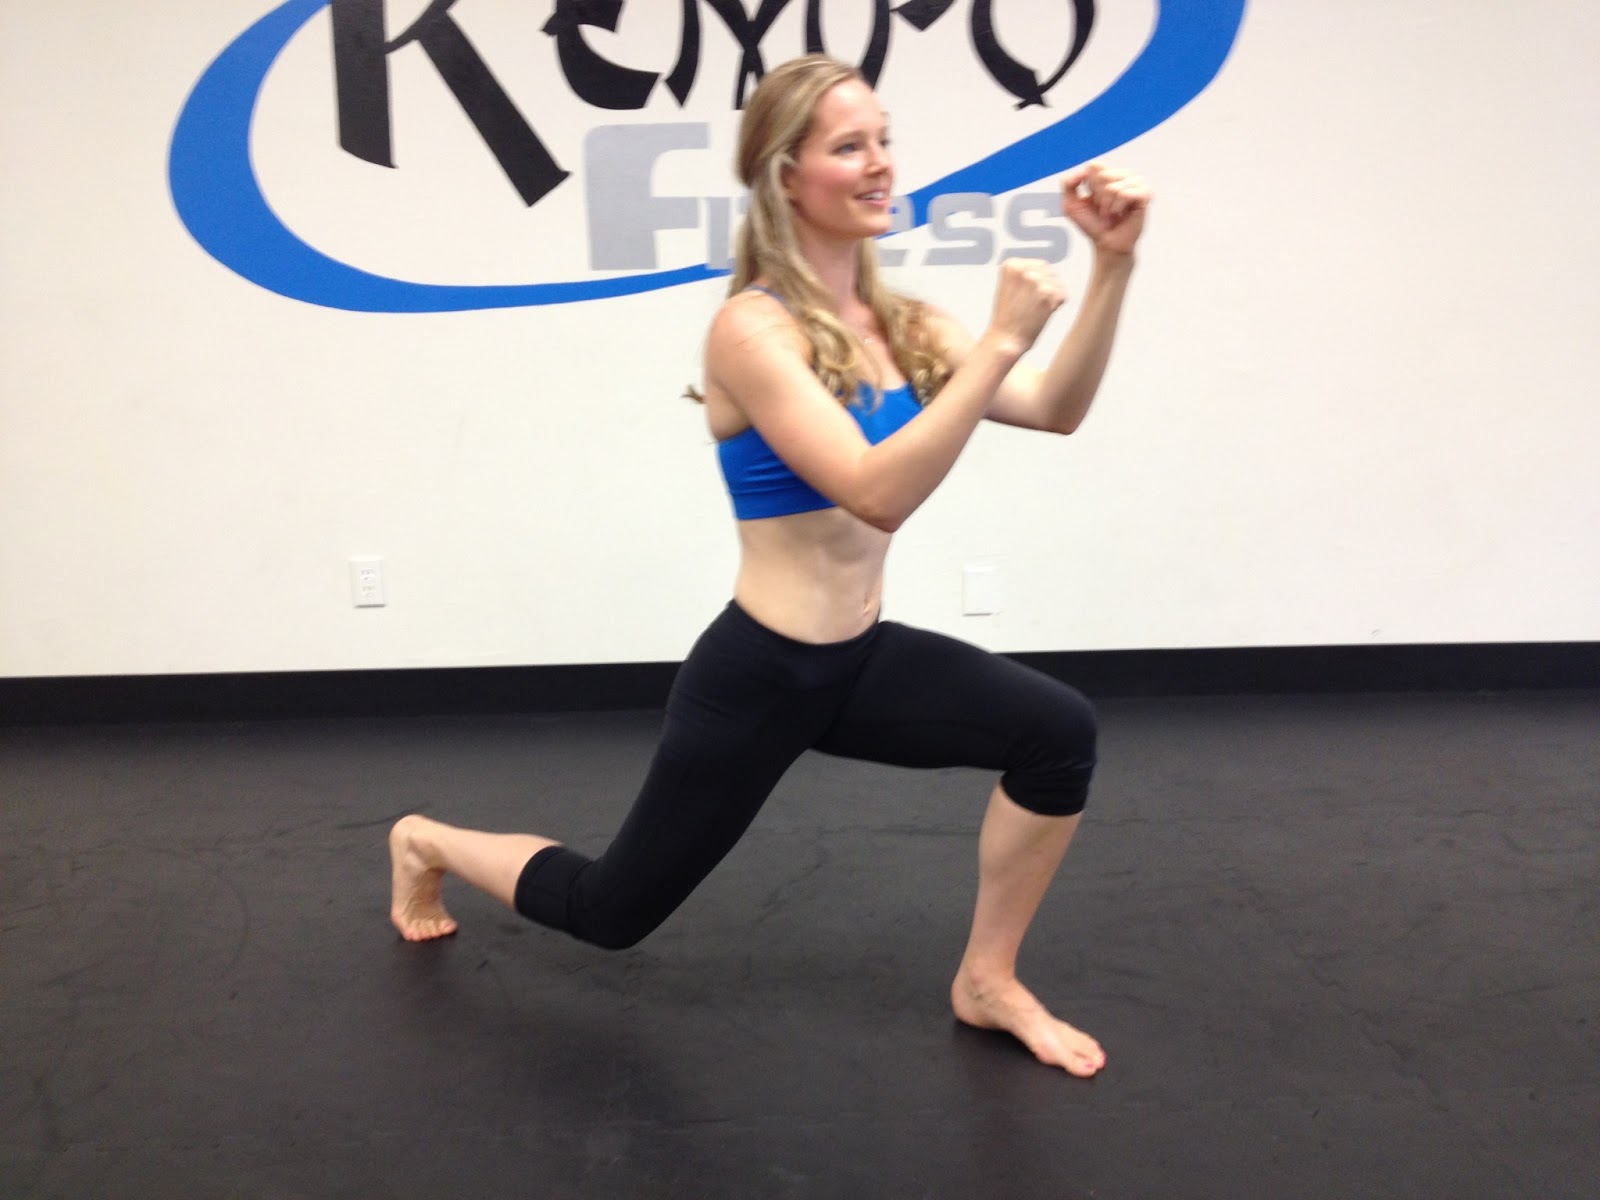
Step your right leg back, keeping your weight on your left leg.  Tuck your hips under, pull your belly in to support your lower back, and open your chest.  Maintain this position throughout the exercise.  Now, pull your thigh muscles in toward the bone and lunge straight down.  Make sure that you do NOT let your knee buckle in or come past the toes on your front foot.  In addition, it is very important to keep most of the weight off your back knee.  To do this, keep as little weight on the back foot as possible (think of it as just being there for stabilization).  From here, focus on pulling in to your core as you explode upwards, bringing your right knee up high while at the same time pulling down with your arms for a “Rising Knee” (if you are martial arts inclined, add a front ball kick here).  Return to the starting position.
You can do this move both fast and slow.  Slow, you will work your stabilizing muscles and your core; fast you will work your heart and develop your fast-twitch muscles.  For slow, go for 3 rounds of 10-20 Lunge/Knee Combos on each side.  For fast, go for 2- 30 sec – 1 minute rounds.

Wednesday, June 12, 2013

Week 3 - postpartum - journey back to excellent fitness

Week 3.  This week I was feeling the need to start moving more; some things turned out good, some things not so good.  For the good, I found that rising leg lifts have been a gentle way to start getting my legs and core warmed up again.  For the not so good: squats.  I know, I know…I just had a baby…what was I thinking?!?!  I was thinking: I don’t like my saddle bags and dimpled legs…I must do something to get them back into shape!  But my body quickly told me I need to wait a few more weeks for those wonderful squat exercises. 

I still am not carrying my 30 pound son around but I think by next week I’ll be picking him up for some big bear hugs again.  In general though, I’m feeling pretty darn good!
If you want to try out the leg lifts, read on:

Leg Lifts
I’ve been starting off with only 1 set of 10 to the front, side, and back, making sure to keep my kicks relatively low and slow.  This will make sure that I work all sides of my legs while not straining my midsection.
Since our insides need to heal after having a baby, you have to make sure not push your core muscles very much.  In addition, since your core muscles have been stretched to the limit and then put thru the ringer, they are probably going to be a bit weaker than normal; this means that if you try to work them too much your body will compensate for their weakened state by recruiting your lower back muscles…this is not what you want.  So, in order to still get a “good” workout, you need to really extend the leg, reaching out thru your toes; this will activate all of your leg muscles.   Flex each muscle and then act as though you are pushing up and down against something, giving your leg more resistance than just air.
Tuck your belly in and lift your chest up and open to support your lower back.  Maintain this position throughout the exercise.  Inhale as you lift your leg up, exhale as you return your leg back to the starting position.  Go for 1 round of 10 reps to the front, side, and back.
Note: Hold onto something for stabilization as needed (we don’t need you toppling over!).

Wednesday, June 5, 2013

V Core Power -- Great for those Abs!

This week’s move comes from yoga and is all about working your core and stabilizing muscles.  If you are going to dare to bare your midriff this swimsuit season, core work definitely needs to be a part of your repertoire.  That said, this move is not a cardiovascular exercise so you will need to add in those moves as well (I recommend the “Rising Knee – Front Ball Kick” and the “World of Knees” (front, side, and roundhouse) to name a few).  And now, without further ado, get ready for the:

V Core Power
Note:  If at any point your back begins to hurt, stop, relax, and stretch out a bit.  Once you feel better, begin at the starting position again, making sure to go through all the steps.

Starting Position
Begin seated on the floor with your knees pulled up to your chest.  For this exercise is it very important that you really focus on using your core and stabilizing muscles to support your lower back; to do this, pull your belly in toward your spine, open and lift your chest, and try to lengthen your spine (pull your spine up through the crown of your head).  Make sure you continually work of maintaining this support throughout the entire exercise!  To bring in the rest of your body, press your knees and feet together to activate your leg muscles.  In addition, extend your arms out in front of your shoulders, lengthening and tightening your arm muscles as much as you can; this will activate all of your arm muscles.  Now for the 3 levels of the “V Core Power”.  Begin with the 1st level.  If you can successfully do this without causing any back pain, move on to the 2nd level.  Again, if you can successfully do this level without causing any back pain, then and only then, should you progress on to level 3.

Level 1 – Full Modification
Keep the starting position described above.  To activate your core, lean back slightly with your upper body; this will make you hold up the weight of your upper body with your core muscles while still giving you support and grounding since your feet are on the floor.  Keep pressing those legs together to pull some of the work into your other muscles groups.  Start with 3-6 rounds of 10 seconds.  If this goes well, begin increasing the duration of your rounds.  Once you can do 2-4 rounds of 30 seconds, move on to Level 2.
Level 2 – Half V

Begin at the Level 1 position.  Now, we’re going to eliminate the extra leg stabilization by picking your feet up off the ground.  Keep your knees bent and pressing together while holding your calves parallel to the ground.  Make sure you keep pulling in with your belly and extending out and up with your chest!!!  Again, start with 3-6 rounds of 10 seconds.  If this goes well, begin increasing the duration of your rounds.  Your goal is to do 2-4 rounds of 30 seconds.  If you can do this without any back pain, try increasing the time; see if you can get up to 1 minute!  Once you can do either of these last two things, you can move on to Level 3.
Level 3 – Full V

Begin in the Level 2 position.  Keeping the knees and thighs pressed together, lift your feet up until your legs are straight.  Now you will really feel your legs working in addition to the rest of your body!  If you are in the proper position, your body will be making a symmetrical V shape.  Please, please, please make sure you keep pulling your belly in and extending out and up with your chest!!!  Like in the other rounds, start with 3-6 rounds of 10 seconds.  If this goes well, begin increasing the duration of your rounds.  Your goal is to do 2-4 rounds of 30 seconds.  If you can do this without any back pain, try increasing the time; see if you can get up to 1 minute! 

 Have fun!